

Cast-iron skillets are an indispensable tool in the world of cooking, and in this blog, we invite you to embark on a culinary journey filled with flavor, tradition, and versatility. Our “10 Best Cast-Iron Skillet Recipes to Make All Year Round” is a celebration of the enduring appeal of these timeless kitchen essentials.
These heavy-duty pans have graced kitchens for generations, known for their ability to distribute heat evenly and impart a unique depth of flavor to every dish they touch. In this collection, we explore a diverse array of recipes, ranging from perfectly seared steaks to sizzling fajitas, mouthwatering apple pies to decadent skillet brownies.
We’ll also delve into the art of cast-iron skillet maintenance and share essential tips for ensuring the longevity of your skillet. With their natural non-stick surface and unmatched durability, these skillets truly shine when it comes to versatile and delectable cooking.
Best Cast-Iron Skillet Recipes
Unleash the culinary magic of cast-iron skillets with our curated selection of the best recipes. From perfectly seared steaks to mouthwatering apple pies, these dishes showcase the unmatched versatility and flavor-enhancing qualities of cast-iron cooking. Elevate your meals with these delectable creations!
Skillet Cornbread

Skillet cornbread is a beloved classic in the world of Southern cuisine and a perfect representation of the magic that happens when you combine a cast-iron skillet with the right ingredients. What sets this cornbread apart is its unmistakable texture—a delightful contrast of a crispy, golden-brown crust and a moist, tender crumb. The skillet, preheated to perfection, ensures an even heat distribution, resulting in a consistent and flavorful bake. The choice of using buttermilk adds a tangy note, balancing the sweetness of the cornmeal. Served hot, it’s a side dish that complements everything from chili to fried chicken. Whether you’re a seasoned cook or a kitchen novice, mastering the art of skillet cornbread is an essential culinary journey that’s both satisfying and comforting.
Also Read- 7 High-Protein Dinner Recipes for a Nourishing Week
Skillet Cornbread Recipe
Ingredients:
- 1 cup cornmeal
- 1 cup all-purpose flour
- 1/4 cup granulated sugar
- 1 tablespoon baking powder
- 1/2 teaspoon baking soda
- 1/2 teaspoon salt
- 1 1/4 cups buttermilk
- 1/4 cup unsalted butter, melted
- 2 large eggs
- 2 tablespoons vegetable oil
Instructions:
- Preheat the Oven: Preheat your oven to 425°F (220°C) and place a 10-inch cast-iron skillet in the oven while it heats up.
- Mix Dry Ingredients: In a large bowl, whisk together the cornmeal, all-purpose flour, sugar, baking powder, baking soda, and salt.
- Combine Wet Ingredients: In a separate bowl, whisk together the buttermilk, melted butter, and eggs.
- Create Batter: Pour the wet ingredients into the dry ingredients and stir until just combined. Be careful not to overmix; a few lumps are okay.
- Grease the Skillet: Carefully remove the hot skillet from the oven (use oven mitts!), add the vegetable oil, and swirl it around to coat the bottom and sides.
- Pour the Batter: Pour the cornbread batter into the hot skillet. It should sizzle when it hits the skillet.
- Bake: Place the skillet in the oven and bake for 20-25 minutes or until the cornbread is golden brown on top and a toothpick inserted into the center comes out clean.
- Serve: Allow the cornbread to cool for a few minutes before slicing and serving. Enjoy your delicious skillet cornbread!
Pan-Seared Steak

Pan-seared steak is a culinary masterpiece that tantalizes the senses and satisfies the most discerning palates. This method of cooking is a celebration of simplicity, focusing on the quality of the meat itself. A thick, well-marbled steak is seasoned with salt and pepper, allowing the rich flavors of the meat to shine through. It’s then seared in a hot, heavy-duty skillet, preferably cast iron, to create a beautifully caramelized crust on the outside while retaining a juicy, tender interior.
Pan-Seared Steak Recipe
Ingredients:
- 2 boneless ribeye or New York strip steaks (1 to 1.5 inches thick)
- 2 tablespoons olive oil
- 2 cloves garlic, minced
- 2 sprigs of fresh rosemary (optional)
- Salt and freshly ground black pepper, to taste
- 2 tablespoons unsalted butter
Instructions:
- Bring the Steak to Room Temperature: Take the steaks out of the refrigerator and allow them to come to room temperature for about 30 minutes. This ensures even cooking.
- Preheat the Skillet: Place a heavy-duty skillet, preferably cast iron, over medium-high heat. Let it get smoking hot.
- Season the Steak: Rub both sides of the steaks with olive oil, minced garlic, and generous amounts of salt and freshly ground black pepper. You can also add fresh rosemary sprigs for extra flavor.
- Sear the Steaks: Carefully place the steaks in the hot skillet. Sear them for about 3-4 minutes on each side for medium-rare, depending on the thickness and your desired level of doneness.
- Add Butter for Flavor: In the last minute of cooking, add the unsalted butter to the skillet. Tilt the pan and spoon the melted butter over the steaks to baste them.
- Rest and Slice: Remove the steaks from the skillet and let them rest for a few minutes. This allows the juices to redistribute.
- Slice and Serve: Slice the steaks against the grain and serve immediately. You can drizzle any remaining pan juices over the slices for extra flavor.
One-Pan Chicken and Veggies
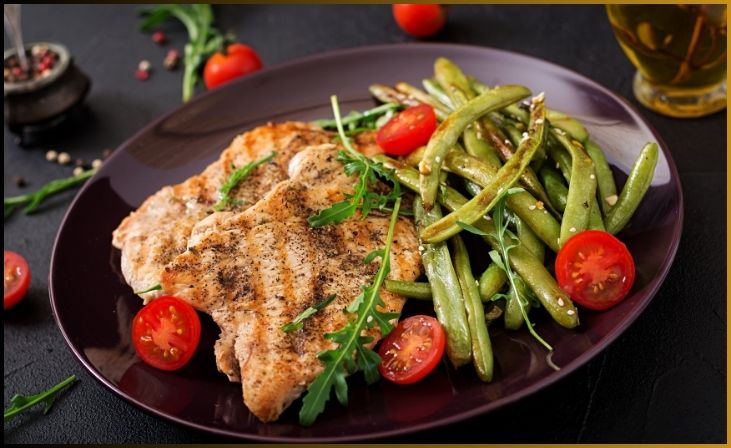
One-pan chicken and veggies is a hassle-free and wholesome meal. It’s a convenient cooking method that involves roasting seasoned chicken alongside a colorful assortment of vegetables all on a single baking sheet. The result is tender, juicy chicken with a golden, crispy skin, surrounded by roasted vegetables that are packed with flavor. It’s a time-saving, family-friendly dish that’s easy to prepare and even easier to clean up, making it a go-to recipe for busy weeknights.
One-Pan Chicken and Veggies Recipe
Ingredients:
- 4 boneless, skinless chicken breasts
- 4 cups of mixed vegetables (e.g., carrots, broccoli, bell peppers)
- 2 tablespoons olive oil
- 1 teaspoon dried thyme
- 1 teaspoon dried rosemary
- 1 teaspoon garlic powder
- Salt and pepper to taste
- 1 lemon, sliced
- Fresh parsley for garnish
Instructions:
- Preheat the Oven: Preheat your oven to 400°F (200°C).
- Prep the Chicken: Season the chicken breasts with olive oil, dried thyme, dried rosemary, garlic powder, salt, and pepper. Make sure both sides are coated evenly.
- Prepare the Vegetables: Cut your chosen vegetables into bite-sized pieces and toss them with a bit of olive oil, salt, and pepper.
- Assemble on a Baking Sheet: Line a baking sheet with parchment paper for easy cleanup. Place the seasoned chicken breasts and the seasoned vegetables on the baking sheet.
- Add Lemon Slices: Place lemon slices on top of the chicken for extra flavor.
- Bake: Roast in the preheated oven for about 20-25 minutes, or until the chicken reaches an internal temperature of 165°F (74°C) and the vegetables are tender.
- Garnish and Serve: Remove from the oven, garnish with fresh parsley, and serve your one-pan chicken and veggies immediately.
Frittata

A frittata is an Italian egg dish that’s as versatile as it is delicious. It’s made by whisking eggs and mixing them with various ingredients like vegetables, cheese, herbs, or even meats. The mixture is then poured into a skillet and cooked until set, either on the stovetop or finished in the oven. Frittatas are a fantastic way to use up leftover ingredients, creating a flavorful and satisfying meal that can be enjoyed for breakfast, brunch, or a quick dinner. Their simplicity and adaptability make frittatas a favorite for home cooks looking for a tasty and easy-to-prepare dish.
Frittata Recipe
Ingredients:
- 6 large eggs
- 1/4 cup milk
- 1 cup diced vegetables (bell peppers, onions, spinach, mushrooms, etc.)
- 1 cup shredded cheese (cheddar, mozzarella, or your choice)
- 1/4 cup fresh herbs (parsley, basil, or thyme), chopped
- Salt and pepper to taste
- 2 tablespoons olive oil
- Optional: diced cooked bacon or ham
Instructions:
- Preheat the Broiler: Set your oven’s broiler to low or prepare a broiler in your oven.
- Prep the Ingredients: In a bowl, whisk together the eggs, milk, and a pinch of salt and pepper. Stir in the diced vegetables, fresh herbs, and half of the shredded cheese. If you’re using cooked bacon or ham, add it to the mixture.
- Heat the Skillet: Heat an ovenproof skillet (usually around 10 inches in diameter) over medium heat. Add the olive oil and ensure it coats the entire pan.
- Cook the Frittata: Pour the egg mixture into the skillet and cook it without stirring for 4-5 minutes, or until the edges begin to set. Sprinkle the remaining cheese on top.
- Broil: Transfer the skillet to the preheated broiler and cook for an additional 3-5 minutes until the frittata is puffed up, golden, and fully set.
- Serve: Carefully remove the skillet from the broiler (use oven mitts), let it cool slightly, then slide the frittata onto a cutting board. Slice it into wedges and serve.
Cast-Iron Pizza

Cast-iron pizza is a delicious twist on the classic Italian favorite. It involves making pizza in a cast-iron skillet, resulting in a thick, crispy, and flavorful crust. The skillet evenly distributes heat, creating a perfect balance between a tender interior and a golden, crunchy bottom. This method allows for creative toppings and a customizable experience, making cast-iron pizza a delightful and easy-to-make treat that’s sure to satisfy your pizza cravings.
Cast-Iron Pizza Recipe
Ingredients:
For the Pizza Dough:
- 2 1/4 teaspoons active dry yeast
- 1 cup warm water
- 2 1/2 cups all-purpose flour
- 2 tablespoons olive oil
- 1 teaspoon salt
- 1 teaspoon sugar
For the Pizza Toppings:
- 1 cup pizza sauce
- 2 cups shredded mozzarella cheese
- Your favorite pizza toppings (pepperoni, bell peppers, onions, etc.)
Instructions:
For the Pizza Dough:
- Activate the Yeast: In a small bowl, combine warm water and sugar. Sprinkle the yeast over the water and let it sit for about 5-10 minutes until it becomes foamy.
- Mix the Dough: In a large mixing bowl, combine the flour and salt. Pour the yeast mixture and olive oil into the dry ingredients. Stir until a dough forms.
- Knead the Dough: On a floured surface, knead the dough for about 5 minutes until it becomes smooth. Form it into a ball and place it in a greased bowl. Cover with a kitchen towel and let it rise for 1-2 hours or until doubled in size.
For the Pizza:
- Preheat the Oven: Preheat your oven to 475°F (245°C) with the cast-iron skillet inside.
- Roll out the Dough: Roll out the pizza dough on a floured surface to fit the size of your cast-iron skillet.
- Add the Dough to the Skillet: Carefully remove the hot skillet from the oven. Grease it with a bit of olive oil. Place the rolled-out dough in the skillet, making sure it covers the bottom and slightly goes up the sides.
- Add Toppings: Spread the pizza sauce evenly on the dough, then sprinkle with mozzarella cheese and your choice of pizza toppings.
- Bake: Place the skillet in the preheated oven and bake for about 15-20 minutes, or until the crust is golden and the cheese is bubbly.
- Serve: Carefully remove the cast-iron pizza from the oven, let it cool for a few minutes, then slice and serve your delicious homemade pizza!
Sautéed Brussels Sprouts
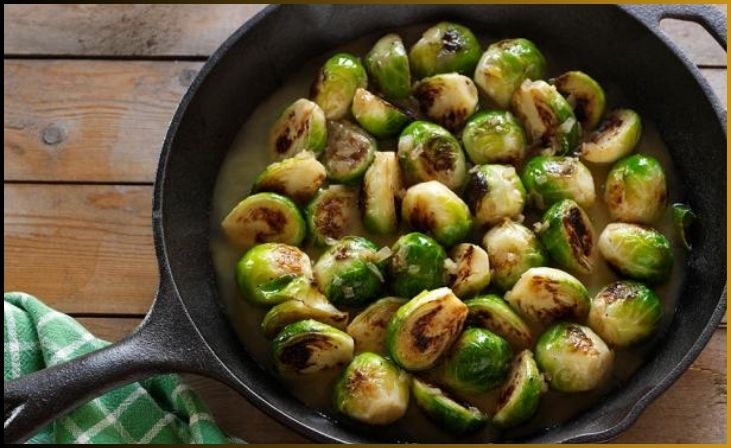
Sautéed Brussels sprouts are a delectable side dish that elevates these cruciferous vegetables into a delightful treat. To make them, Brussels sprouts are sliced and quickly cooked in a hot pan with a bit of oil or butter until they become tender and develop a crispy, caramelized exterior. Seasoned with salt, pepper, and sometimes a hint of garlic or lemon, sautéed Brussels sprouts offer a flavorful and slightly nutty taste that can convert even the most skeptical eaters into sprout enthusiasts. It’s a quick and easy way to prepare a nutritious side dish that complements a wide range of main courses.
For More- 8 Delicious Pasta Salad Recipes Perfect for Feeding a Crowd
Sautéed Brussels Sprouts Recipe
Ingredients:
- 1 pound fresh Brussels sprouts
- 2 tablespoons olive oil
- 2 cloves garlic, minced
- Salt and freshly ground black pepper, to taste
- 2-3 tablespoons grated Parmesan cheese (optional)
- 1-2 tablespoons lemon juice (optional)
Instructions:
- Prepare the Brussels Sprouts: Start by trimming the ends of the Brussels sprouts and removing any discolored outer leaves. Cut each sprout in half.
- Sauté the Garlic: In a large skillet, heat the olive oil over medium heat. Add the minced garlic and sauté for about 1-2 minutes until fragrant. Be careful not to let it brown.
- Sauté the Brussels Sprouts: Add the halved Brussels sprouts to the skillet. Sauté them in the garlic-infused oil, stirring occasionally. Cook for about 5-7 minutes, or until the Brussels sprouts become tender and lightly browned.
- Season: Season the sautéed Brussels sprouts with salt and freshly ground black pepper to taste. If desired, you can also drizzle them with lemon juice for extra freshness and flavor.
- Optional Parmesan: To take it up a notch, sprinkle the sautéed Brussels sprouts with grated Parmesan cheese and let it melt over the hot sprouts.
- Serve: Transfer the Brussels sprouts to a serving dish and serve them immediately as a delightful and flavorful side dish.
Skillet Lasagna
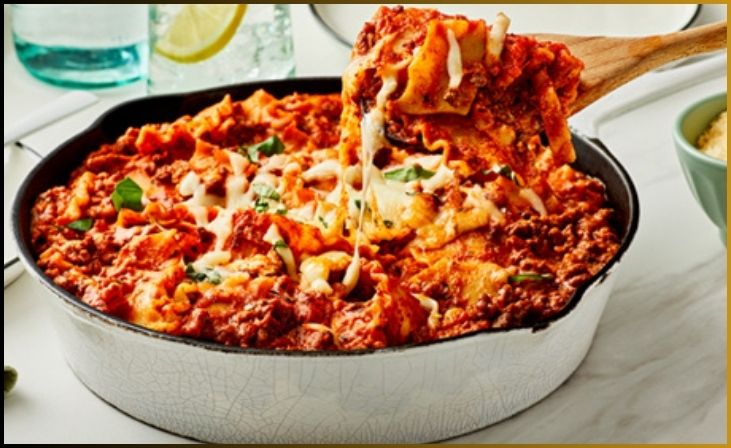
Skillet lasagna is a brilliant shortcut to the beloved Italian classic. This one-pan wonder simplifies the traditional layered lasagna into a single skillet dish. It typically involves cooking ground meat, tomato sauce, and lasagna noodles in one pan, layering it with cheese and letting it simmer until the pasta is cooked through. The result is a delicious, cheesy, and comforting meal that captures the essence of lasagna with far less effort. Skillet lasagna is a time-saving and family-friendly option that still delivers all the flavors and textures we adore in a classic lasagna.
Skillet Lasagna Recipe
Ingredients:
- 1 pound ground beef (or Italian sausage, if preferred)
- 1 onion, chopped
- 2 cloves garlic, minced
- 1 (24-ounce) jar of marinara sauce
- 2 1/2 cups water
- 1 1/2 cups uncooked rotini pasta
- 1 1/2 cups ricotta cheese
- 2 cups shredded mozzarella cheese
- 1/2 cup grated Parmesan cheese
- Salt and black pepper to taste
- Fresh basil or parsley for garnish (optional)
Instructions:
- Cook the Meat: In a large skillet, brown the ground beef (or Italian sausage) over medium-high heat, breaking it into crumbles as it cooks. Drain excess fat if needed. Add chopped onions and garlic, and sauté for an additional 2-3 minutes until they become soft.
- Add the Sauce and Water: Stir in the marinara sauce and water, bringing the mixture to a boil.
- Add Pasta: Add the uncooked rotini pasta to the skillet. Reduce the heat, cover, and let it simmer for about 12-15 minutes, or until the pasta is al dente, stirring occasionally.
- Layer with Cheeses: Dollop spoonfuls of ricotta cheese over the pasta mixture. Sprinkle with mozzarella and Parmesan cheese. Season with salt and black pepper.
- Cover and Melt: Cover the skillet and let it simmer for an additional 2-3 minutes until the cheese is melted and bubbly.
- Garnish and Serve: If desired, garnish with fresh basil or parsley. Serve your skillet lasagna hot.
Crispy Pan-Roasted Potatoes
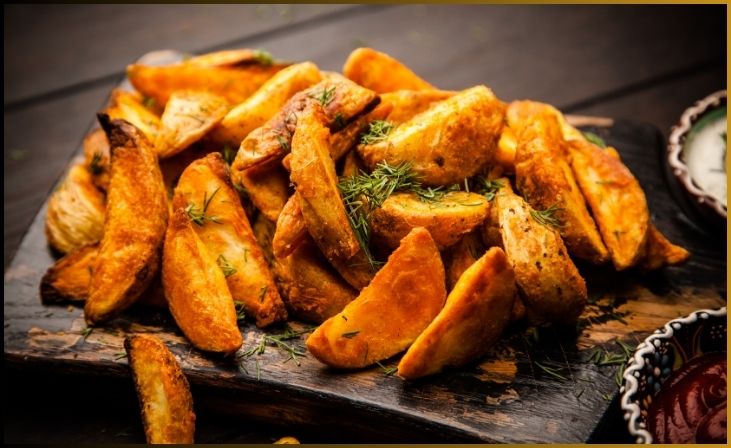
Crispy pan-roasted potatoes are a delightful side dish loved for their golden, crunchy exterior and tender, flavorful interior. To create them, small potato chunks are pan-roasted in a skillet with a blend of oil or butter until they achieve a satisfying crispiness. This method allows for the potatoes to absorb the flavors of any accompanying herbs and seasonings, resulting in a dish that’s simple, yet incredibly delicious. Crispy pan-roasted potatoes are a versatile and universally loved addition to any meal, from breakfast to dinner, making them a timeless classic in the world of comfort food.
Crispy Pan-Roasted Potatoes Recipe
Ingredients:
- 1 1/2 pounds of baby or small potatoes (red, gold, or fingerling)
- 2-3 tablespoons olive oil
- 2-3 cloves of garlic, minced
- 1 teaspoon dried rosemary or thyme
- Salt and black pepper to taste
- Fresh parsley, chopped (optional, for garnish)
Instructions:
- Preheat the Oven: Preheat your oven to 425°F (220°C).
- Prepare the Potatoes: If the potatoes are larger, cut them into bite-sized pieces. Leave smaller potatoes whole. Place them in a bowl.
- Toss with Seasonings: In the bowl with the potatoes, add olive oil, minced garlic, dried rosemary (or thyme), salt, and black pepper. Toss everything together to ensure the potatoes are evenly coated.
- Heat the Skillet: Heat an ovenproof skillet (preferably cast iron) over medium-high heat. Add a bit of olive oil to prevent sticking.
- Pan-Roast the Potatoes: Once the skillet is hot, carefully add the seasoned potatoes. Allow them to cook without stirring for about 4-5 minutes, allowing the bottoms to brown and crisp up.
- Transfer to the Oven: Transfer the skillet to the preheated oven and roast the potatoes for 15-20 minutes, or until they are tender and crispy. Make sure to toss them once or twice during this time to ensure even cooking.
- Garnish and Serve: Remove the skillet from the oven. If desired, garnish the crispy pan-roasted potatoes with freshly chopped parsley before serving.
Blackened Fish Tacos
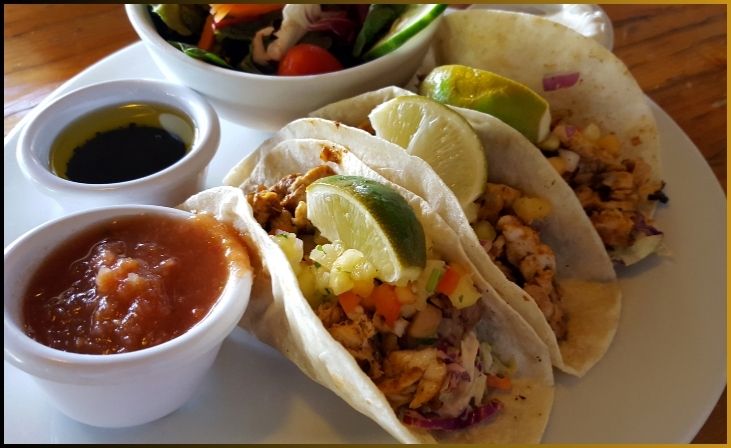
Blackened fish tacos are a zesty and satisfying meal that blends bold flavors with a hint of spice. Typically, white fish fillets are generously coated with a mixture of aromatic spices and herbs, including paprika, cayenne, and oregano. These seasoned fillets are then seared in a hot skillet, creating a flavorful, slightly charred crust. The blackened fish is served in soft tortillas, complemented by crisp lettuce, creamy sauces, and zesty toppings like salsa and lime. The result is a fusion of textures and tastes that make every bite an adventure, offering a delightful combination of heat, freshness, and savory goodness.
Blackened Fish Tacos Recipe
Ingredients:
For the Blackened Seasoning:
- 1 1/2 teaspoons smoked paprika
- 1 teaspoon dried thyme
- 1 teaspoon dried oregano
- 1/2 teaspoon garlic powder
- 1/2 teaspoon onion powder
- 1/2 teaspoon cayenne pepper (adjust to your spice preference)
- 1/2 teaspoon salt
- 1/2 teaspoon black pepper
For the Fish:
- 1 pound white fish fillets (such as tilapia or cod)
- 2 tablespoons olive oil
- 8 small corn or flour tortillas
- Shredded lettuce or cabbage
- Sliced tomatoes
- Sliced red onions
- Sliced avocados
- Fresh cilantro for garnish
- Lime wedges for serving
For the Sauce:
- 1/2 cup mayonnaise
- 1/4 cup sour cream
- 1 tablespoon lime juice
- 1 teaspoon cumin
- 1 teaspoon paprika
- Salt and black pepper to taste
Instructions:
For the Blackened Seasoning:
- In a small bowl, combine all the blackened seasoning ingredients and mix well.
For the Sauce:
- In another bowl, whisk together the mayonnaise, sour cream, lime juice, cumin, and paprika. Season with salt and black pepper to taste. Set aside.
For the Fish:
- Rub the blackened seasoning evenly over both sides of the fish fillets.
- In a large skillet, heat olive oil over medium-high heat.
- Add the seasoned fish fillets to the skillet and cook for about 3-4 minutes per side, or until the fish is cooked through and has a blackened crust.
Assemble the Tacos:
- Warm the tortillas in the skillet or in the oven.
- To each tortilla, add some shredded lettuce or cabbage, a blackened fish fillet, sliced tomatoes, red onions, and avocados.
- Drizzle the sauce over the taco filling.
- Garnish with fresh cilantro and serve with lime wedges.
Skillet Cobbler
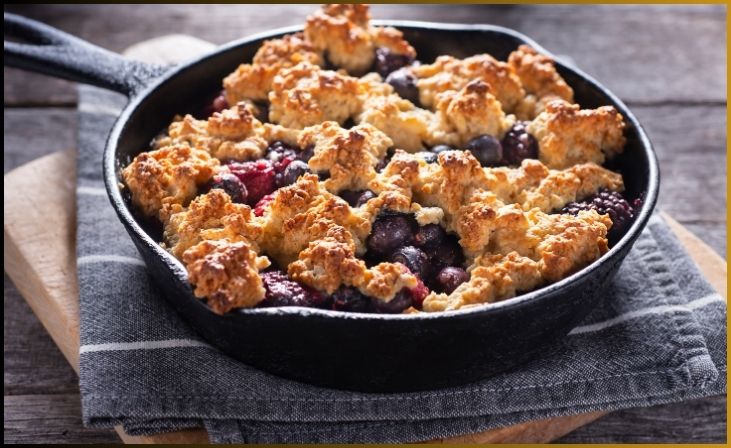
Skillet cobbler is a warm and comforting dessert that brings together the irresistible combination of sweet, juicy fruit and a buttery, golden-brown topping. Typically baked in a cast-iron skillet, this dessert starts with a layer of fruit like berries, peaches, or apples, often sweetened and spiced. On top of the fruit, a cobbler dough is spooned or dropped, creating a biscuit-like layer. As it bakes, the fruit becomes tender and bubbling, and the cobbler topping turns beautifully crispy.
Skillet Cobbler Recipe
Ingredients:
For the Filling:
- 4 cups of your choice of fresh or frozen fruit (such as peaches, berries, apples, or a combination)
- 1/2 cup granulated sugar (adjust to taste)
- 1 tablespoon cornstarch
- 1 teaspoon vanilla extract (optional)
- 1 tablespoon lemon juice (optional)
For the Cobbler Topping:
- 1 cup all-purpose flour
- 1/2 cup granulated sugar
- 1 1/2 teaspoons baking powder
- 1/2 teaspoon salt
- 1/2 cup milk
- 1/4 cup unsalted butter, melted
Instructions:
For the Filling:
- Preheat your oven to 375°F (190°C).
- In a large ovenproof skillet, combine the fruit, granulated sugar, and cornstarch. If desired, add vanilla extract and lemon juice to enhance the flavor.
- Cook the fruit mixture over medium heat, stirring occasionally, until it begins to bubble and thicken. This should take about 5-7 minutes. Remove from heat.
For the Cobbler Topping:
- In a separate bowl, combine the flour, granulated sugar, baking powder, and salt.
- Add the milk and melted butter to the dry ingredients, stirring until the mixture is smooth.
Assemble and Bake:
- Spoon the cobbler topping over the fruit filling in the skillet, distributing it evenly.
- Place the skillet in the preheated oven and bake for 25-30 minutes or until the cobbler topping is golden and the fruit filling is bubbly.
- Remove the skillet from the oven (use oven mitts), and let it cool for a few minutes.
- Serve your skillet cobbler warm, optionally with a scoop of vanilla ice cream or a dollop of whipped cream.
Click Here- Healthy Smoothie Recipes Your Kids Will Love
Essential Tips for Cast-Iron Cooking
Cooking with cast-iron skillets is a delightful and rewarding experience, but it’s important to follow some essential tips to ensure you make the most of these versatile kitchen companions. Here are some key guidelines to keep in mind:
Season Your Skillet: Before your first use and periodically thereafter, season your cast-iron skillet by applying a thin layer of cooking oil and heating it. This process helps create a natural non-stick surface and prevents rust.
Preheat Gradually: Cast iron heats slowly but retains heat exceptionally well. Preheat your skillet gradually on low to medium heat to prevent food from sticking and ensure even cooking.
Use the Right Tools: Opt for utensils that won’t scratch the seasoned surface, such as wooden or silicone utensils. Metal utensils can damage the seasoning.
Avoid Acidic Foods: Acidic ingredients like tomatoes and vinegar can erode the seasoning. Limit cooking highly acidic dishes in your cast-iron skillet.
Regular Maintenance: After cooking, clean your skillet with hot water and a stiff brush. Avoid using soap, as it can strip the seasoning. Dry it thoroughly to prevent rust.
Re-Season as Needed: If your skillet loses its non-stick quality or appears dull, it’s time to re-season it. Apply a thin layer of oil and heat it in the oven.
Store Properly: When storing your skillet, ensure it’s completely dry, and place a paper towel or cloth inside to absorb moisture. This prevents rust.
Bottom Line
In the world of cooking, the cast-iron skillet is truly a kitchen hero. Its versatility, durability, and ability to create mouthwatering dishes have earned it a special place in the hearts of home chefs and food enthusiasts. This collection of 10 best cast-iron skillet recipes showcases the incredible culinary possibilities this kitchen essential offers all year round.
From sizzling steaks to hearty cornbread and delightful cobblers, these recipes bring a perfect balance of tradition and innovation to your table. Whether you’re a seasoned chef or just starting your culinary journey, the cast-iron skillet is your trusted partner in crafting memorable meals that are as comforting as they are delicious. So, grab your skillet, get creative, and savor the delectable delights you can whip up with this timeless kitchen tool.
FAQs
Absolutely! Cast iron is great for recipes that require high heat, like searing steaks or baking cornbread. Its even heat distribution and natural non-stick surface make it ideal for these applications.
Cleaning is simple: use warm water, a soft brush or sponge, and avoid harsh detergents. After washing, thoroughly dry the skillet and apply a thin layer of vegetable oil to keep it seasoned.
Yes, cast iron works well on gas, electric, and induction stovetops, making it a versatile choice for all kitchens.
To re-season, clean the skillet, dry it thoroughly, and apply a thin layer of vegetable oil or shortening. Heat it in the oven at 350°F (175°C) for an hour. Let it cool, and it should be good as new.